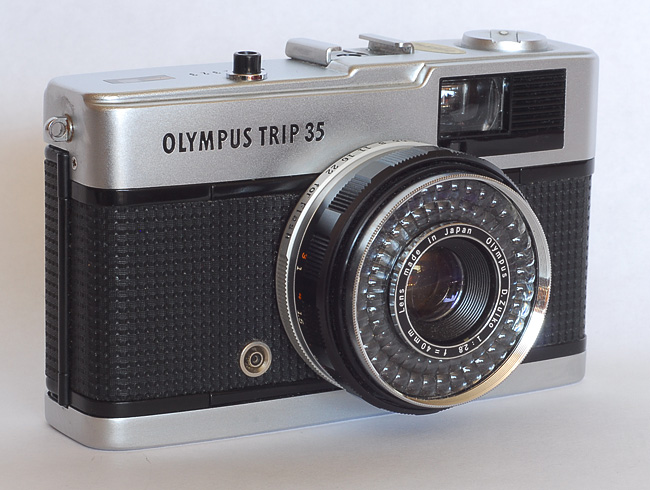
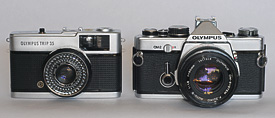
 In the two decades between 1968 and 1988, the Olympus camera company produced something like 10 million of these cameras. That’s nearly one a minute, every minute, for 20 years. Apparently, they were popular. And why not? They’re simple and fun to use. From today’s all-polycarbonate perspective, the Trip seems fantastically well made, as anyone who has held one will attest. This is one solid little camera — there’s very little plastic and all the controls feel sure and positive.
If you equate simplicity with refined design, the Trip will appeal to you. Once you’ve loaded the film, the only control you have to adjust is the focus, leaving you free to concentrate on the composition. The camera chooses the f/ratio and shutter speed based on lighting conditions. If there isn’t sufficient light, a red flag pops up in the viewfinder and the shutter release is locked. It’s fool proof. What’s more, you never have to worry about batteries running low since the Trip doesn’t use them — the camera’s selenium-cell metering system runs on daylight.
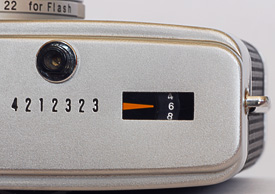
On the camera's top panel you'll find the shutter release button and an unusually clear exposure-counter window.
The Trip has only two shutter speeds: 1/40 and 1/200. These in combination with the f/2.8 to f/22 aperture range cover a span of 8 1/3 stops which, with the right film, takes care of scenes shot in bright sunshine to those photographed in well-lit interiors. I suspect the slightly odd 1/40 shutter speed was chosen because the lens’s focal length is 40mm. A well known rule-of-thumb states that the slowest shutter speed most people can hand hold is the inverse of the lens’s focal length. Of course, it could be the other way around too — the 40mm lens could have been chosen to match the 1/40 shutter speed.
One very useful feature the Trip has that many point-and-shoots lack is the ability to lock in the exposure with a half-press of the shutter release. This is handy when you’re dealing with a subject that is strongly back lit. You meter off the subject, half-press the shutter release, then re-aim to get the composition you want. I also like that you can see the focus setting in the viewfinder window.
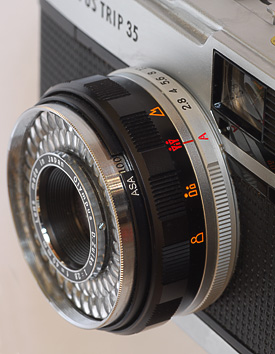
Most of the Trip's controls are found on the lens housing. From front to back, these are the ISO (ASA), focus (indicated with icons on top and actual distances under the lens), and the aperture/Automatic dial.
Even though the Trip is fully automatic, you can engage basic exposure compensation by adjusting the ASA-ring at the front of the lens. For example, if you’re using ISO 200 film and want to add a full stop of exposure compensation, simply set the ISO to 100. Easy. You can also invoke a limited kind of manual control by moving the aperture ring off “A” to one of the “for flash” aperture settings, but you have to keep in mind two things. First, the shutter speed defaults to 1/40 in this mode. Second, the camera will stop the aperture down to whatever it thinks it needs, regardless of what you dial in. For example, if you set the aperture to f/5.6 but the camera thinks it needs to be at f/16, f/16 is what you’ll get. However, if you select f/5.6 but really need f/2.8, you’ll get f/5.6 and end up underexposed by two stops. This is why it’s usually best to leave the camera on automatic and use the ISO dial in those rare instances when you want to override the camera’s metering system.
With most cameras, you’d choose the ISO of the film based on the expected lighting conditions. With the Trip, things are a bit different because it has only two shutter speeds. This means that when you pick your film, you’re in effect also deciding where along the EV scale you’re going to position your 8 1/3-stop exposure window. So, let’s suppose you’ve chosen ISO 200 film. The Trip’s fastest shutter speed (1/200 second) and smallest aperture (f/22) will work for scenes up to roughly 2/3 stops brighter than EV 15, which is equivalent to the illumination on a bright, sunny day. You have a little headroom there so you won’t be badly blowing your highlights if parts of the image are brighter than that. At the dim end of the range, the camera has a maximum lens opening of f/2.8 and operates at 1/40 second. That gets you about 1/3 stop above EV 7. Not bad.
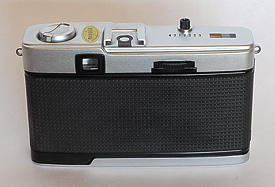
Rear view of the Trip. Note that film advance is accomplished with a thumb-dial, rather than the usual lever.
What happens if you use ISO 400 film instead? At the dim end of the range you can now reach down to EV 6 1/3, but you effectively lose 1 EV at the bright end. Fully-sunlight scenes will potentially be one stop overexposed even when the camera is at its fastest shutter speed and smallest aperture. Given the latitude of print film, this probably isn’t fatal, but if you shoot slides, it’s a concern. Still, if low light figures in your plans and you don’t find the extra grain of ISO 400 objectionable, this might be the best choice.
But what if we go the other way and use ISO 100 film? Compared to ISO 200, you’ll get marginally finer grain (which might be important to the kinds of photography you do), but you’ll lose capability at the dim end of the range while gaining meaningless headroom at the bright end (the camera will still fire at 1/200, but the aperture will open up to f/16 instead of f/22). In effect, your 8-stop window shrinks to a useful range of only 7 stops since there’s really not much to shoot that’s as bright as EV 17! With slower films, the problem gets worse — you lose even more capability in dim light and make relatively meaningless gains at the bright end of the range.
So, for slide film, ISO 200 is probably ideal. For print, 200 is still a good choice, but if shooting in dimmer situations is important to you, then 400 might be better. One thing to keep in mind with ISO 400 is that you lose out on the opportunity to use the camera’s ISO adjustment for negative (decreased) exposure compensation since the Trip can’t be set for ISOs greater than 400. You can still invoke positive exposure compensation though by dialing in a lower setting.
I find using the Trip liberating. There’s very little to think about — you just aim, focus, and shoot. It really is a fun camera to carry around and its sharp lens delivers great results. While it’s not terribly versatile, it does what it’s meant to do very capably. I think for street photography it has a lot to recommend it. The camera’s metering system works well and it’s rare to blow an exposure so badly that the shot can’t be salvaged. Even when I use slide film, the Trip works like a champ. Pretty much the only mistake you can make is failing to set the focus, but even that isn’t fantastically critical unless you shoot in subdued light.
Of the two Trips I own, I think the expensive one set me back $12. You can easily pay more than that on eBay, but if you frequent thrift stores, you’re likely to come across one for cheap eventually. (Check to make sure that the red flag pops up when it should — there are lots of broken units in circulation.) Probably the worst thing about the Trip is that you might bump into someone who thinks you spent several hundred dollars for one of the new digital Olympus Pen cameras. If so, have fun telling them your camera is an advanced full-frame model, but cost only as much as a cheap lunch.
For a more comprehensive overview of the Trip, check out Ken Rockwell’s excellent essay here. And if you really want dive deep into the Trip universe, spend some time on the Flikr Olympus Trip 35 group .
Did you find this article interesting or helpful? If so, consider using this link the next time you shop at Amazon.com. Better yet, bookmark it for future use. Thanks to Amazon’s associates program, doing so costs you nothing yet helps keep this site up and running. Thanks!
For more of my camera reviews, click here.


 Subscribe with RSS
Pingback: Olympus Trip 35 – Dave Lawrence Photography