Getting to know a new camera is always fun and full of interesting little surprises. The Belair Cityslicker is no exception. Indeed, given its expansive feature set, surprises are almost guaranteed. For example, to my surprise, I found the Belair has something in common with another medium-format camera: the legendary Hasselblad.
You might not imagine that the venerable, tough-as-nails heavyweight Hasselblad shares any traits with Lomography’s lightweight, plastic offering, but you’d be wrong. As it turns out, with both cameras you have to hold down the shutter release until you hear it close, otherwise the exposure will be cut short. As for build quality, well, let’s just say they’re intended for different segments of the camera-buying market.
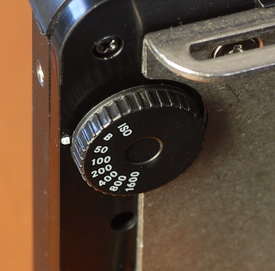
The camera's ISO setting and bulb mode are selected with this small dial, located on the rear face of the lens board.
The Belair’s shutter and metering system are the source of other surprises too. For starters, the Belair will expose for up to 30 seconds in non-bulb mode, if you hold the shutter-release lever down that long. Apparently, the camera will meter in very low-light situations, which makes the omission of a cable-release socket puzzling. And the shutter will indeed fire without batteries. So, if your batteries die, you’ll still be able to take pictures, albeit only at the fastest shutter speed, but with two aperture settings. However, the Belair’s bulb function does require power.
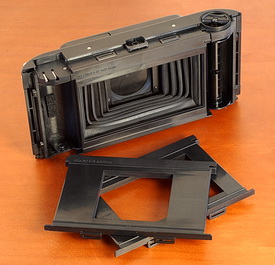
Having checked out the camera pretty carefully, it was time to load it with film and give it a try. The first step is to decide which aspect ratio to shoot. You can choose from 6×6, 6×9, or 6×12, by selecting the appropriate mask. The masks themselves are made of plastic, but seem sturdy enough. However, they have two “features” that are less than desirable. First, the masks place a 4mm wide ledge of glossy black plastic in front of the film. Light glancing off this surface will produce a bright inner “frame” on the negative. I’ve seen this effect in several sample photos presented on-line, and no doubt, this is the cause. A second niggle is that the height of the mask openings is only 52mm. I’m being very picky here, but on most of my other medium-format cameras, it’s a bit more generous — typically about 56mm. That’s not a huge amount of real estate to give up on the negative (about 14% in a 6×6 frame), but it’s a slightly puzzling design choice.
Once a mask is in place inside the camera you’re more or less comitted to it for the duration of the roll. Swapping formats mid-roll is tricky, though it can be done if you have a changing bag or handy access to a totally dark room. You have to remove the film, rewind it, and then switch masks before advancing the film back to where it was. That’s not really practical in most circumstances though.
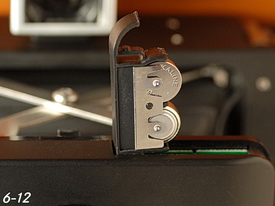
For my first outing I loaded the camera with a roll of Fuji Acros 100, my favourite medium-format black-and-white emulsion. Given that the camera’s fastest shutter speed is 1/125 second (according to the specifications in the manual) and its minimum aperture is f/16, ISO 100 seems like the best choice unless you plan on shooting mostly in dim situations and don’t use a tripod. The Belair lets you select ISO settings (from 50 to 1600, in 1-stop increments) with a small dial, situated behind the lens board. This same control also allows you to put the camera into bulb mode.
The Belair has a useful, undocumented feature: exposure lock. This is handy in situations where you may want to place your subject off centre in the frame — centre the subject, engage the exposure lock, then re-frame. To do this on the Belair, press the shutter release down until you hear a faint “click.” This occurs after the lever is most of the way through its travel, and just before the shutter fires. The “click” signifies the exposure is locked. Pressing the shutter release the rest of the way fires the shutter. If you want to re-do the exposure lock before taking the picture, just let the lever travel back to its rest position and try again.
Using the exposure lock this way requires a little finessing, so practice a few times with the camera’s lens capped. You’ll get the hang of it soon enough. As an added bonus, taking pictures this way also reduces the chance of camera jiggle, which helps during longer exposures.
Taking pictures with the Belair isn’t all that different from many cameras in my collection, but it does involve a little more preparation than a run-of-the-mill point-and-shoot. After you’ve chosen your format mask, loaded the film, and set the ISO dial, taking a photo is a 5-step process.
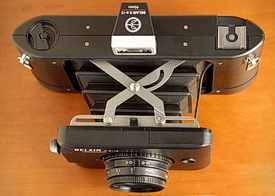
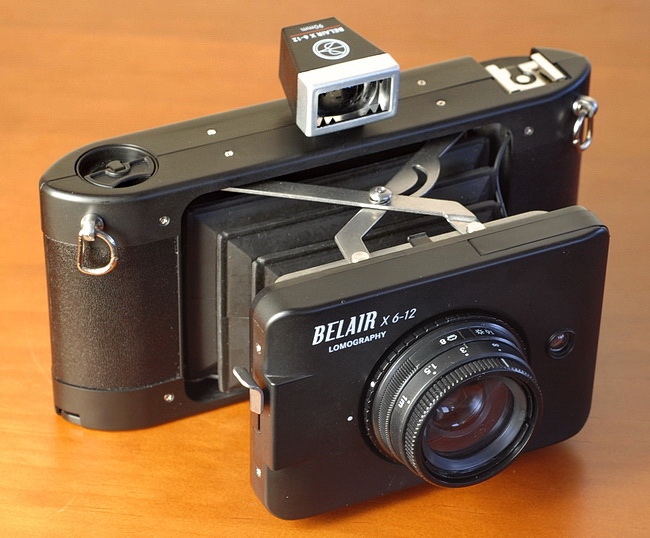
Bellows fully extended and locked into position. To retract the lens board, you have to push two buttons (one on top, one on the underside) at the cross points of the lens-board struts.
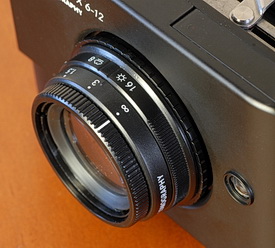
Focus and aperture controls are on the lens barrel. The prominent white index mark shows the focus setting, while a much less obvious indent indicates aperture. The small, round window to the right of the lens is the light sensor, which controls the camera's shutter speed. You have to be careful not to cover it when holding the camera.
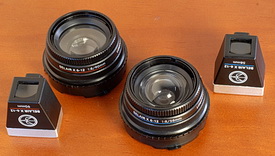
1. Decide which lens to use.You have two choices: 90mm and 58mm.
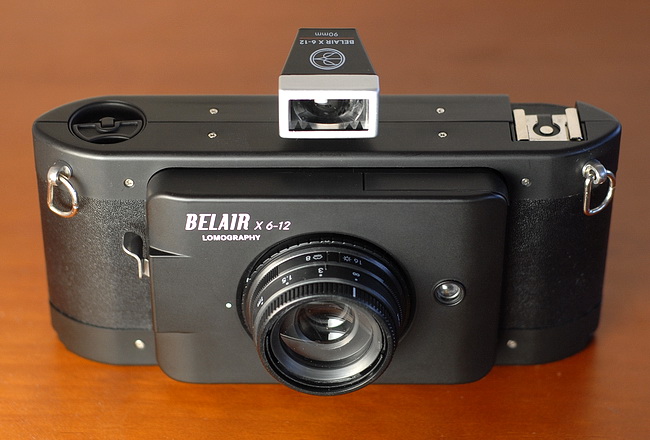
2. Attach the correct finder. A word about the finders — they’re not great. Neither the little pointers that indicate the frame edges for the different formats, nor the scene you’re viewing, are in sharp focus — everything is a bit blurry. A second problem is that precise framing is largely out of the question. There are no parallax correction marks and depending on where you position your eye, you can take in more or less of the scene. In other words, leave yourself a little extra space around the subject of your photo.
3. Extend the bellows. Pushing a button on the underside of the camera releases the spring-loaded lens-board. Be aware that there’s no safety mechanism to prevent you from taking pictures with the lens board retracted. Or course if you did, the resulting images would be badly out of focus.
4. Set the aperture. Choose either f/16, or f/8, depending on lighting conditions and the depth of field you desire. In full sunlight, you’ll have to use f/16 to avoid overexposure even if you’re using ISO 100 film. Inside the camera’s lens mount, there is a little switch that tells the metering system which aperture setting you’ve chosen. This is why the forthcoming Russian lenses will also only have apertures of f/8 and f/16.
5. Focus. The camera is guestimation (zone) focus, from a close-focus distance of 1 meter, out to infinity. Since you’re restricted to a maximum aperture of f/8, your best-guess should be accurate enough most of the time. If you really want to get precise, you can always attach an auxiliary rangefinder. Those living in non-metric countries (yes, I’m looking at you U.S.A.!) will be annoyed to discover that the distance markings are metric only: 1, 1.5, and 3 meters, which translates into 3, 5, and 10 feet.
Okay, done all that? Now you can finally press the shutter release. The camera fires with a reassuring, staccato double click. It’s not exactly whisper quiet like my Yashica-Mat, but then again, it’s a lot more discrete than any SLR. Once you’ve taken your photo, you have to remember to wind the film to the next frame to avoid double exposures (unless that’s your thing). Again, this step requires a bit of extra care since you have to ensure that the little slider on the frame-counter window is in the correct position to show the numbers that correspond to the format you’ve chosen. And if you’ve selected the 6×12 size, you use only the even-numbered frames.
I used a tripod when I shot my first roll. Given the maximum aperture of f/8, with ISO 100 film, this is going to be the norm in a lot of lighting situations. Because the Belair’s shutter release is on the lens board, you don’t get as much help from the tripod as usual — the steadiness of the setup is somewhat dependent on the rigidity of the camera’s folding mechanism. Again, not to harp on this point, but here’s where a cable-release socket would prove handy. I found the best way to actuate the shutter release is to place my thumb under the lens board to help support it, and trigger the shutter with my index finger using a gentle pinching motion.
Like I said before, there’s lots to remember and I won’t be surprised if there’s a few accidental double exposures or overlapping frames in my first few rolls. It’s all part of the “getting to know you” phase of breaking in a new camera.
Did you find this article interesting or helpful? If so, consider using this link the next time you shop at Amazon.com. Better yet, bookmark it for future use. Thanks to Amazon’s associates program, doing so costs you nothing yet helps keep this site up and running. Thanks!
To continue to Part 3, click here.

 Subscribe with RSS


Interesting camera Gary. I’ll be interested in the first light results. Might try a little star trail work or piggyback astrophotography! I’ll be honest, it might do well at f/8 under full moonlight 12-15 minutes with Acros. It could produce some interesting work.
Thank you for your review, it’s much appreciated. I was wondering if you have had any problems rewinding the film? I’ve shot two rolls and on each the film does not wind tightly to the spool. I’m unsure where I’m making the mistake or if its a possible camera defect. Thanks!
And by rewind I mean winding the film onto the 2nd spool. Mine keeps unravelling.
Hi Josh:
I’ll have more to say about this is Part 4 of my review, but the short answer is, yes, I’ve had this problem of the “fat roll” too.
Gary
Thanks. I just got a belair and your post has been very useful.