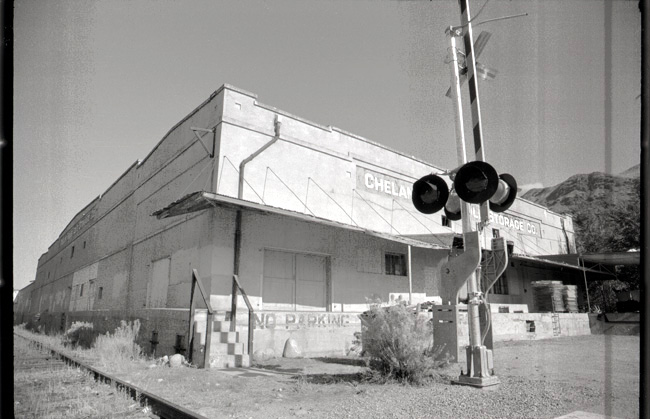
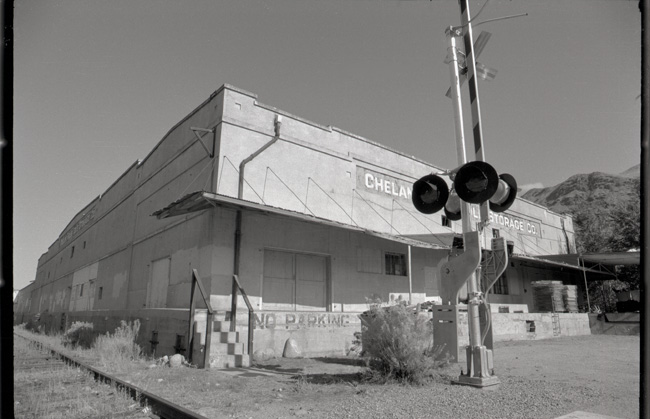
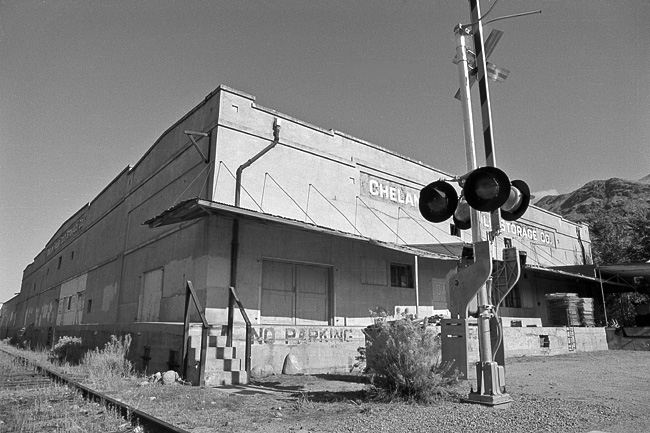
The vertical streaks in this sample image are the result of scanner banding. (The defects are enhanced here for clarity.)
One of the most common scanning problems is a defect known as image banding. Sometimes its appearance is subtle, sometimes it’s not. What’s the cause? Consider how a scanner works: a single-line CCD array slowly sweeps across your negative, slide, or print. If parts of the array differ in sensitivity, you get an unevenness in the resulting scan that manifests itself as one or more ruler straight bands.
Banding is most obvious in photos that have large, even-toned areas (such as sky, or water), and is least troublesome in images that have plenty of intricate detail. Negatives that are particularly dense tend to exhibit the problem more than thin ones. Most scanners produce a small amount of banding, but it’s usually not noticeable. Where it typically becomes an issue is with older equipment, or in my case, a scanner that has just exceeded its warranty period.
So how do you get rid of banding? If you’re using a dedicated negative/slide scanner (as opposed to a flat-bed model), the first thing to try is dusting off the scan head with a blower bulb or compressed air. It only takes one good-sized piece of dust between the scan head and the light source to produce a pretty prominent line on the image. If that doesn’t work, try the solution outlined here:
1. Open your scanning software and select the settings you normally use.
2. Scan your image, but don’t do any cropping. Using Photoshop (or similar image-editing software) you may want to make an initial levels adjustment (Image>Adjustments>Levels, in Photoshop) just so the image is bright enough to work with.
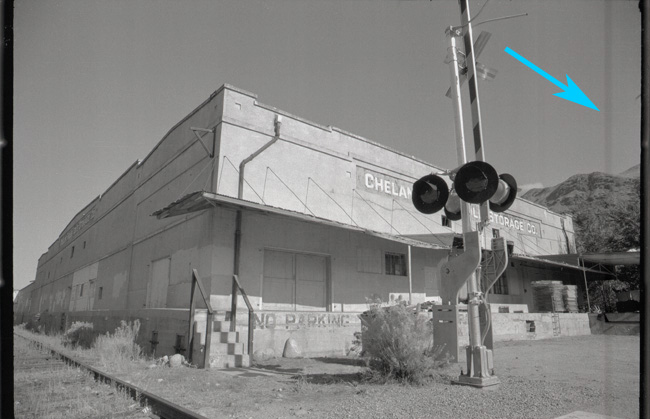
A full-frame sample scan. The arrow points to the worst of the banding, though careful examination reveals additional, less conspicuous streaks elsewhere in the image.
3. Feed a totally black (fully exposed) piece of film into the scanner. I usually use a length of film leader for this.
4. Without changing any of your settings, make a scan. Again, don’t do any cropping. The resulting scan will be your “bias” image, which you will later subtract from your photo.
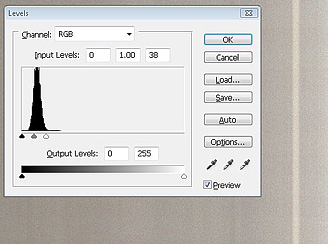 5. Open your bias scan in Photoshop and adjust the levels so that you just start to get clipping of the highlights. It’s best to do this in two steps. First move the highlight slider just to the right of the histogram spike, then click “Okay.” Next, open Levels again and make a second adjustment with the highlight slider. You’ll see that the histogram is more detailed and broader (as shown at right) the second time you open Levels. Leave the mid-tone and shadows sliders alone.
6. Convert your bias image to “grayscale” (Image>Mode>Grayscale). Do this regardless of whether or not you’re working with a black-and-white or colour image.
Your bias image should be a negative (not converted to a positive), that is, the bands should generally appear as light hued streaks against a grey background, as illustrated below. You can save this image and reuse it on future scans done at the same size and resolution. The bias scan also shows very clearly how even (or not) your scanner’s sensitivity is.
7. Copy and paste your bias image into your main image as a new layer.
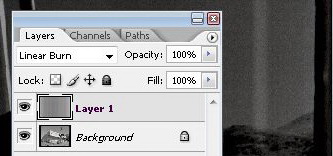 8. Select the bias layer and change the blending mode from “Normal” to “Linear Burn.” (Other blending modes, such as “Overlay” or “Soft Light,” also work well, so experiment to see what looks best.) Things will generally be pretty ugly at this point, but hang on . . .
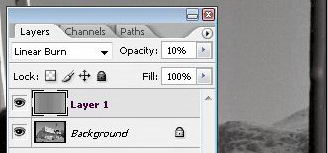 9. Adjust the Opacity slider of the bias layer until the banding disappears. Usually a setting in the range of 5% to 20% is where you’ll end up, but it depends on the specific negative. This step will drain a little contrast out of the image, but you can make the necessary corrections in normal post-processing.
10. Flatten the image layers (Layer>Flatten Image), and proceed to post processing as usual.
The basics of this procedure are pretty straight forward and work for both colour and black-and-white images. You can even use a modified version of this technique for scanned prints — the key thing is make your bias image with the same setting you use for your normal scan.
(Did you find this article helpful? If so, consider using this link the next time you shop at Amazon.com. Better yet, bookmark it for future use. Thanks to Amazon’s associates program, doing so costs you nothing yet helps keep this site up and running. Thanks!)


 Subscribe with RSS



Thanks for this informative article!
very cleaver solution. thanks for the trick!
great blog, great photography.
I occasionally have linear vertical banding that is perfectly straight when scanning 6 x6 negatives on my Epson V500; the streaks continue throughout the scanned negatives. During “Preview” scan with Vuescan, it could be seen beginning before the sensor got to the negative area. It occurred with either Epson’s scanning program or Vuescan, and cleaning the glass surfaces made no difference. Reinstalling driver made no difference. Negatives were without visual evidence of scratches or other defects. I scan strips of 4 negatives, so that means 2 are not in the scanning area of the negative holder; the unscanned negatives should be towards the front of the scanner, as there is a small cutout at the back of the negative holder that I guess is used for sensor calibration. Turns out when I inadverdently left that area covered with negative–when I had the strip sticking out of the holder the wrong way– the vertical bands would appear. Reorienting the film fixed the problem for me. Such a simple cause, but so much frustration.
This was very helpful for me, although not trying to correct a negative scan, but a scan of a photo. It was a face & the lines appeared as very dark lines on the dark sections (hair etc). The lines weren’t visible on the light parts of the photo. I didn’t have a black piece of paper to hand, but a dark blue one, and thought I’d give it a go. I was surprised to see the regular (not random) bands of dark & light in the scan of the dark blue paper (scanner’s very old in the tooth). In my case the steps I used were slightly different, I think I de-saturated the scan first & then adjusted the levels. The resulting top layer worked best at 10% opacity in “lighten” mode. Then upped the contrast of the result by 10%. Not perfect, but a big improvement. Thanks so much for taking the time 🙂
Thanks for the tips Claire.
I’m using an Epson 4990 scanner to scan 35mm slides. In some of the dark areas they turn purple. What setting would I use to eliminate this and get the best scans. I post images on line and make prints. Thank You.
Great article, written with knowledge and style (no 13 pages here), thank you. I had scans like the one in part 6 but without the dark band to the right, I upgraded to Vuescan for my canon usb flatbed scanner and immediately got these plus sometimes green or blueish hue in the background. I cleaned the glass then tried to take the unit apart till I discovered it was glued and mucked around with white point but when I performed a re-calibration in the advanced or “professional” section “Voila” problem gone. Mind you, now I have to learn what all the “hidden” sections do to tweak it as default clears it all, ah well better than failing, and I do like to fiddle as long as I have a win on occasion.
Upgrade, seems like all I had to do was go back to “standard” settings and all is good. Also Vuescan resurrects a lot of old scanners but I would strongly suggest to do the trial first on all intended scanners (limit of four for “family”) mine is now great but my 85 yo. Dads setup just won’t seem to work and it’s on the list, as well as I have screen shared his screen on Skype for many incarnations of the theme. There could be some other issues though as he is sometimes high maintenance of the “don’t know what it is so move it or throw it away variety” Phew, thank goodness we are mac cause it just keeps going anyway. A friend told me at the start of my computing with a new Mac Classic 2 “Their not as smart as chickens” that is they only do what their told, a chicken can change its mind. Very wise words as it turns out.
Thank you Kenneth Dodds!
As you said, Such a simple cause, but so much frustration!